Google Search: Keyword Search:
| Prev | ICM User's Guide 6.8 Labeling and Annotation | Next |
[ Labeling | Atoms | Residues | Move | Variables | Sites | Label Color | Custom Labels | Undisplay Custom Label | Displaying Distances | 2D Chemical Label | Origin ]
| Available in the following product(s): ICM-Browser | ICM-Browser-Pro | ICM-Pro |
To add labels or display or undisplay pre-defined annotation:
- Select the atoms, residues, molecules, or objects you wish to label in the graphical display or in the ICM Workspace.
- Then use the label options in the Display Tab.
To add new user-defined annotation:
- Select the atoms, residues, molecules, or objects you wish to label in the graphical display or in the ICM Workspace.
- Right click on the selection and choose "Annotate Selection".
6.8.1 Labeling |
Labeling options are contained within the Labels or Display Tab. In many cases clicking and holding a label button will allow you to view more options.
6.8.2 Labeling Atoms |
Select the atoms you wish to label (see display structure or selection toolbar).
- Select the display tab.
- Click the label ATOM button.
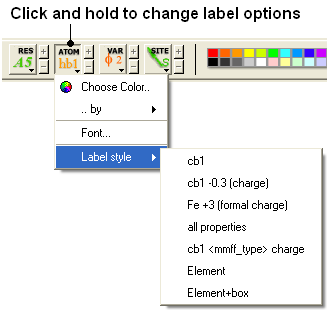
To change the level of label detail:
- Click and hold the label ATOM button and select the desired level of label detail, color or style.
6.8.3 Labeling Residues |
To label residues:
- Select the display tab.
- Select the residues you wish to label (see display structure or selection toolbar).
- Click the label RES button.
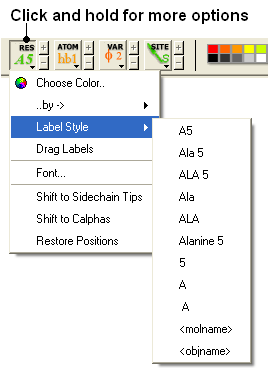
To change the level of label detail:
- Click and hold the label RES button and select the desired level of label detail or style.
6.8.4 Move Residue Label |
To change the location of your residue label:
- Click and hold on the residue label button in the display tab and then choose 'drag labels'.
- If your mouse has a middle mouse button, then click on handle (as shown) of the label you wish to move, and drag it to your desired area.
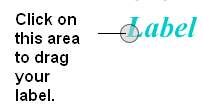
- If your mouse has no middle mouse button, then click on the Translation icon on the toolbar, and click on the handle (as shown) of the label you wish to move, and drag it to your desired area.
The +/- buttons on the side of the Residue and Atom buttons will shift the label. There are also other residue label move options available when you click and hold the residue label button. These options include Shift to Sidechain Tips, Shift to Calphas, and Restore Positions
6.8.5 Label Variables |
To label variable angles (dihedral-torsion, planar and phase angle) the molecule needs to be converted into an ICM object.
- Convert the molecule to an ICM object.
- Select the atoms for which you would like to display the variables (see display structure or selection toolbar).
- Click on the toggle variable label button shown above located in the display tab.
- Change the font size by using the +/- buttons.
- Change the font and color by clicking and holding on the variable atom label button.
To change the variable label style click and hold the variable atom label button as shown below.
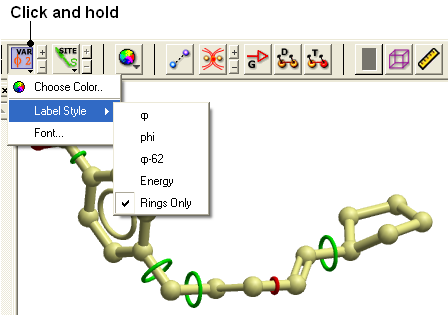
Rings of varying diameter and color are superimposed on rotatable bonds. Green rings with large diameter are considered less constrained than rings with small green rings. Red rings are highly constrained. When the Label Style/Energy option is selected the first number displayed represents the bond angle, the second the energy and the third the worst energy that could be achieved by rotating the bond.
6.8.6 Sites and Annotation |
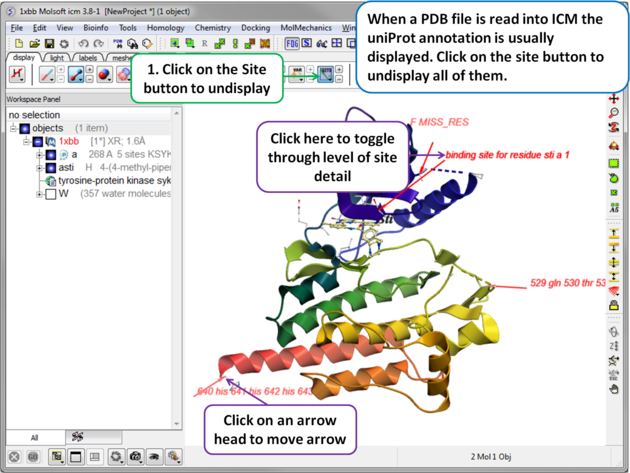 |
| When a PDB file is read into ICM the sequence functional/mutation sites listed in Uniprot are automatically displayed. To undisplay all displayed sites click on the Sites button in the display tab. Click in the bottom left hand corner of the annotated site to change the level of detail or click on an arrow head to move the location. |
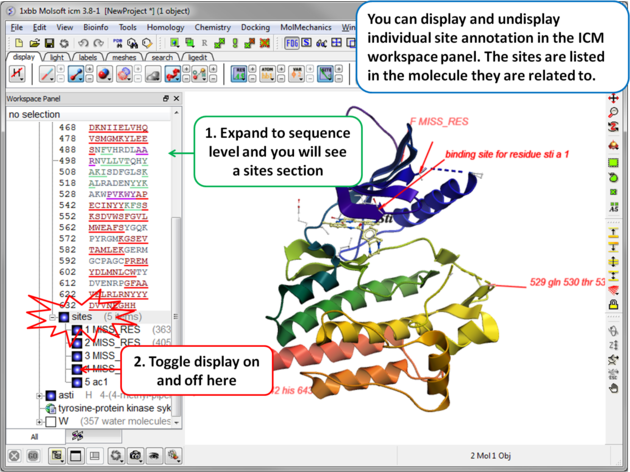 |
| Individual sites can be displayed or undisplayed in the ICM workspace. |
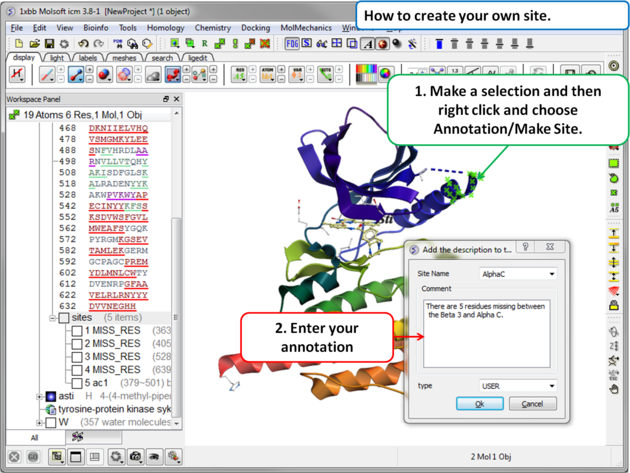 |
To create your own annotated site:
|
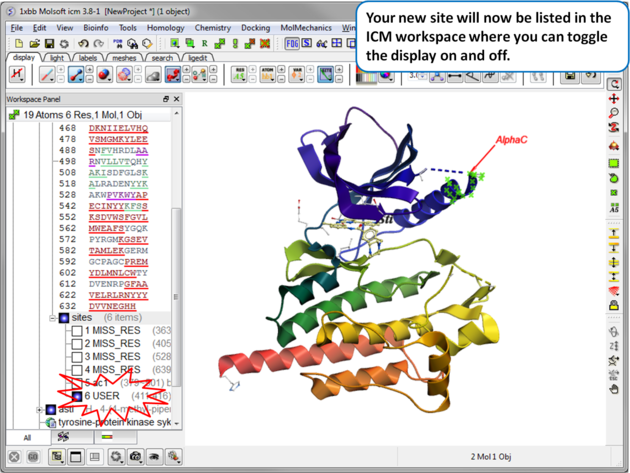 |
| Your new site will now be listed in the ICM Workspace. |
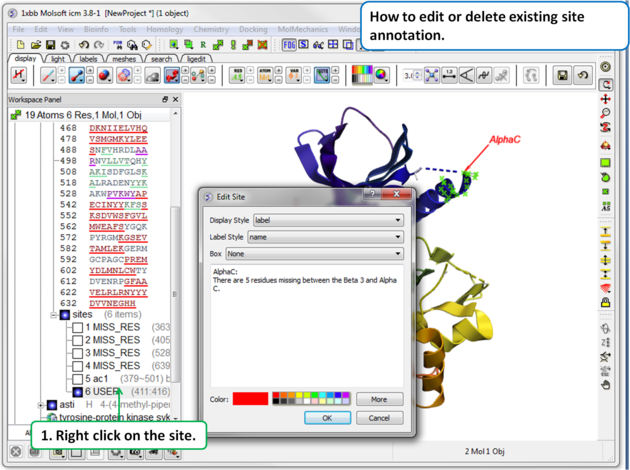 |
To edit or delete a site:
|
6.8.7 Changing Label Colors |
To change the color of any label:
- Click and hold down the required label button and a menu as shown below will be displayed.
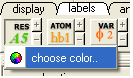
- Select color.
6.8.8 Customized Label 2D or 3D |
To generate a customized a label:
- Select the labels tab.
- Select either 2D or 3D button.
- Enter your label and select the desired color, font and size.
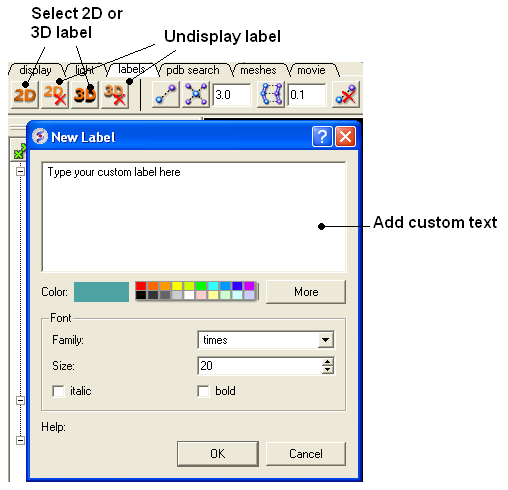
To edit or delete a label - right click on the label in the graphical display as shown below.

| To move a custom 3D label you need to right click on it in the ICM workspace (under meshes) and choose Connect/Move independently. Press the Esc key to disconnect when you have finished moving it. |
6.8.9 Undisplay Customized Label |
Undisplay Residue, Atom, and Variable Label Any label that is displayed can be undisplayed by selecting the region of the molecule related to the label and clicking on the corresponding label button in the labels tab. For example if you wish to undisplay an atom label - click the atom label button. If a label is displayed the corresponding button in the display tab will be shaded blue. When you delete the button will return to grey. 2D and 3D labels have an undisplay button (red cross on the button see customized label section).
Undisplay 2D or 3D label Click onthe undisplay label button in labels tab.
| NOTE: A label can also be deleted by right clicking on the label in the graphical display and selecting delete. |
6.8.10 Labeling Distances |
Within the labels tab there are tools for calculating and displaying distances. These tools can also be found in the Tools/Analysis menu.
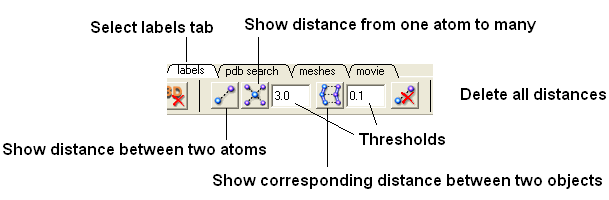
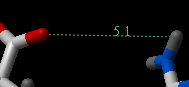
To display distance between two atoms:
- Click on the labels tab (previously called advanced tab).
- Select the measure distance label button first.
- Select the atoms between which you would like to find the distance. (See selection toolbar)
- The distance will be displayed in angstroms, in green.
To find the distance from one atom to many:
- Click on the labels tab (previously called advanced tab).
- Select the atom from which you wish to measure the distance from (See selection toolbar)
- Click on the 'Show Distances From One Atom To Many' button.
- The distances will be displayed in green.
The maximal and minimal distances can be selected by entering values in the boxes shown here (below) in the labels tab (previously called Advanced tab).
![]()
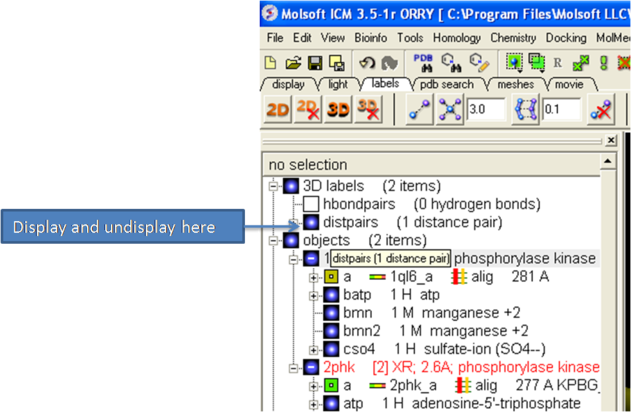
| NOTE: Distances can be displayed and undisplayed in the 3D labels section of the ICM Workspace. See image below. If you right click on the distance in the ICM workspace you can change font type and size. You can also display and undisplay. Distance labels are drawn using Atom label font so you can change it by clicking and holding the atom label button in the Display tab and choose edit Font. |
To change the color of the distance label
- Right click on the distpairs under the 3D labels section of the ICM workspace and select Change Color.
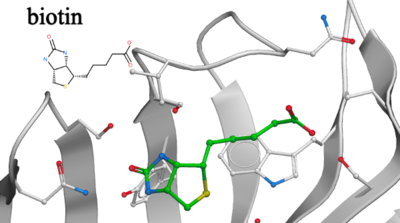
6.8.11 2D Chemical Label |
To display a 2D chemical label alongside the 3D representation of the chemical in the graphics window.
- Read in the pdb file.
- Right click on the ligand in the ICM workspace and choose Tools/Make 2D Chemical Label.
- Select the display options and click OK
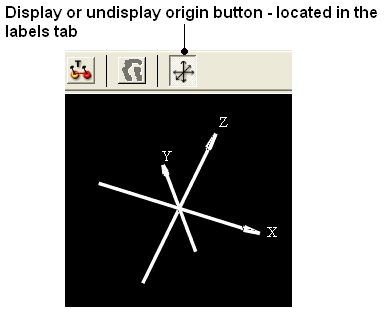
6.8.12 (Un)display Origin |
To display and undisplay the axis of the coordinate frame (origin):
- Select the labels tab and select the toggle origin button.
| Prev 3D Printing | Home Up | Next Distances and Angles |