In this example we will use the 3D interactive editor to modify a cyclin-dependent kinase 5 inhibitor (PDB Code 1UNL). A hydrophobic cavity not occupied by the crystal structure ligand (roscovitine) can be exploited to improve the interaction between the ligand and the receptor. Roscovitine is an experimental drug candidate in the family of cyclin-dependent kinase (CDK) which preferentially inhibits multiple enzyme targets including CDK2, CDK7 and CDK9. It alters the growth phase or state within the cell cycle of treated cells and is in clinical trials for treatment of non-small cell lung cancer (NSCLC), Cushing's Disease, leukemia, HIV infection, herpes simplex infection, cystic fibrosis
 |
| Step 1: Read in the PDB file 1UNL. |
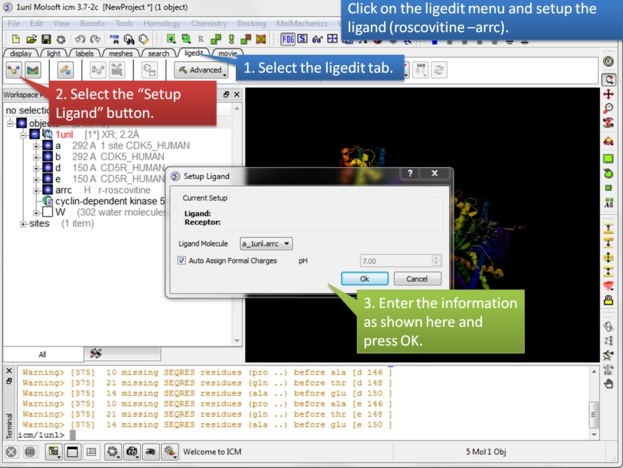 |
| Step 2: Setup the ligand in the 3D ligand editor. |
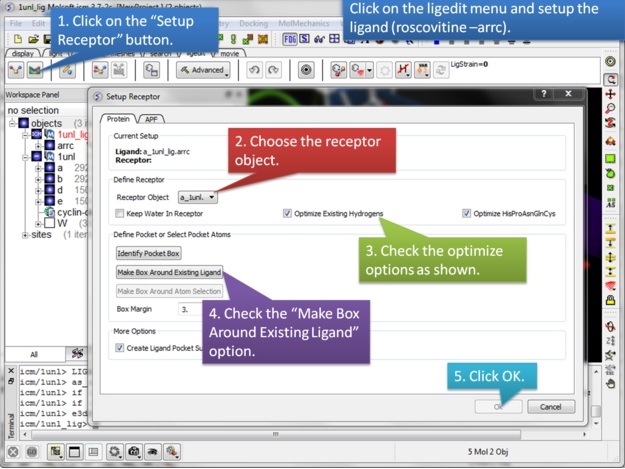 |
| Step 3: Setup the receptor in the 3D ligand editor. |
 |
| Step 4: Observe the new objects, meshes and maps that have been created. |
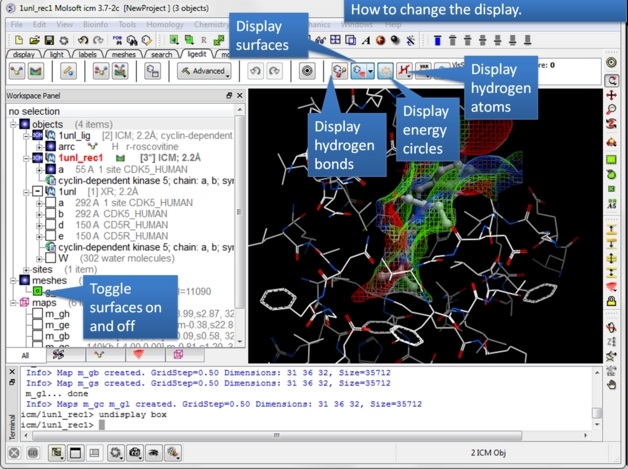 |
| Step 5: You can display and undisplay, hydrogen atoms, surfaces, and hydrogen bonds. |
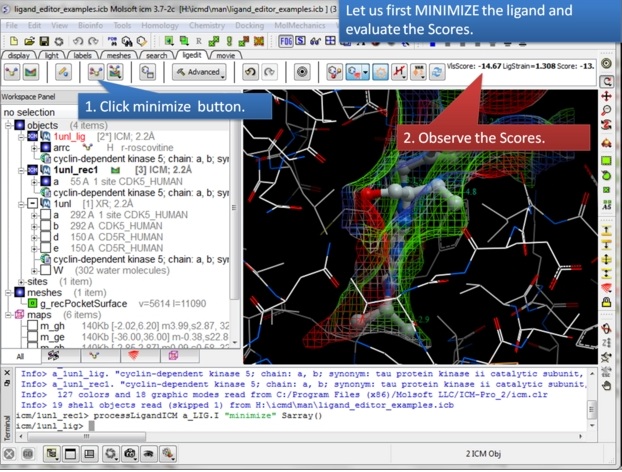 |
| Step 6: First minimize the ligand and observe the Scores. |
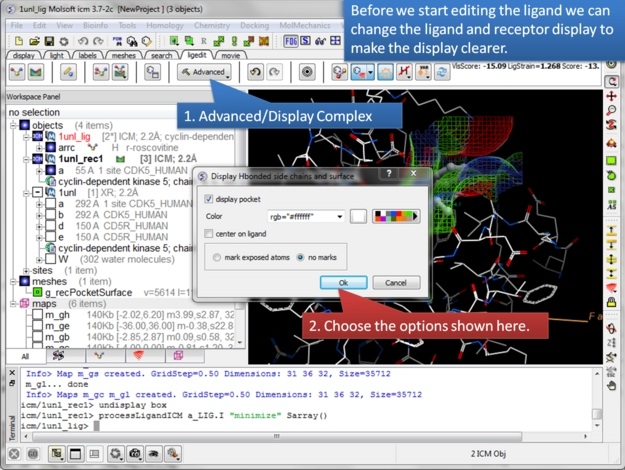 |
| Step 7: In the Advanced menu there is an option to make a clearer view of the complex. |
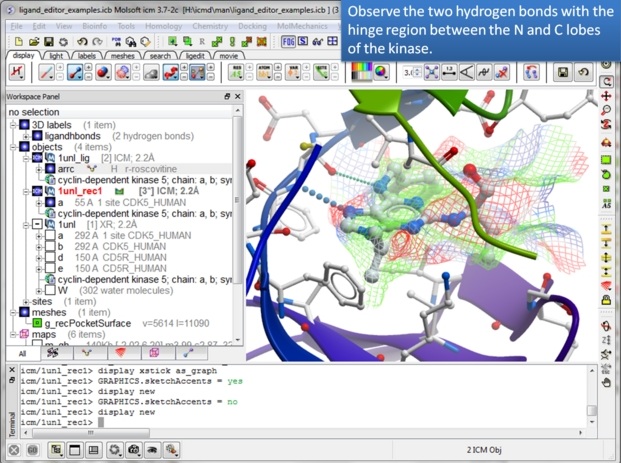 |
| Step 8: Observe that the ligand makes key hydrogen bond interactions with the hinge region of the kinase. It is important to conserve these interactions when making modifications. |
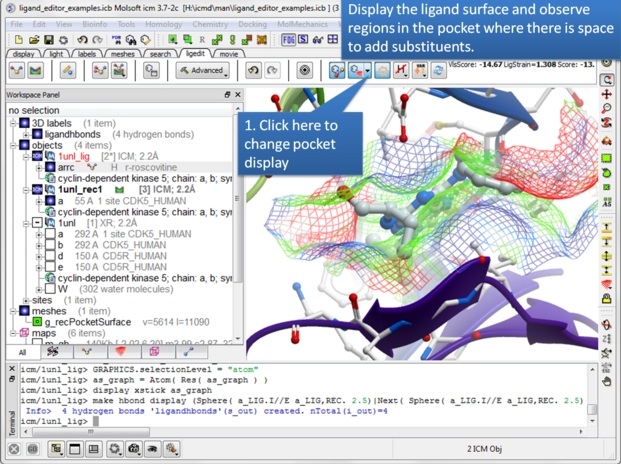 |
| Step 9: The ligand surface representation is a useful way of identifying space in the pocket where you can add groups to the ligand. The surface is colored: White=aromatic lipophilic, Green=non-aromatic other (mostly aliphatic) lipophilic surface, Red=hydrogen bonding acceptor potential, Blue=hydrogen bond donor potential. The coloring of the surface helps you determine which modifications to make, for example if the surface is colored red you ideally would add a hydrogen bond acceptor in that region. |
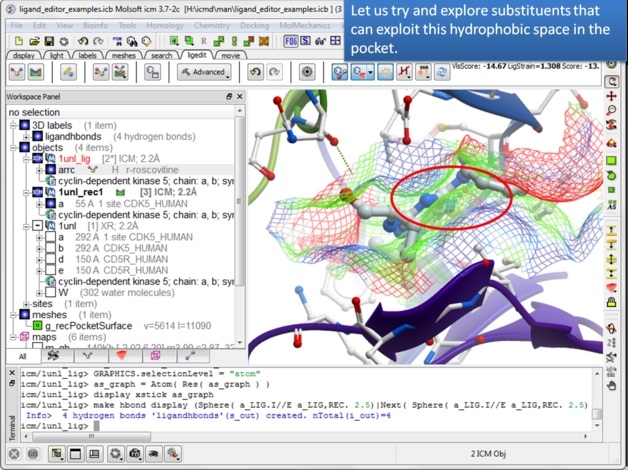 |
| Step 10: There seems to be a hydrophobic region in this pocket that we might try to explore. |
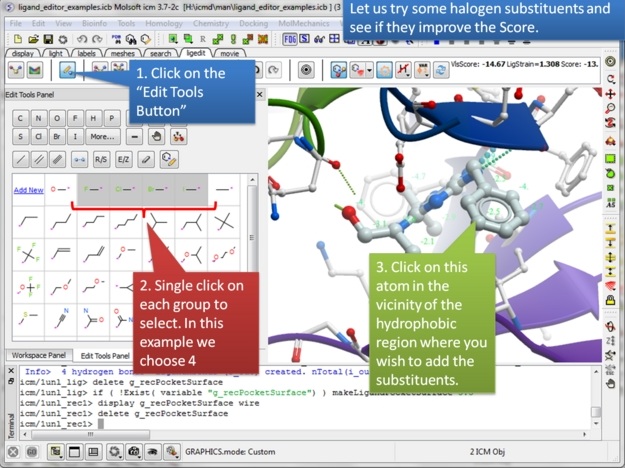 |
| Step 11: You can try any modification group you wish from the "edit tools panel". We will try some halogen substituents and see if they improve the score. |
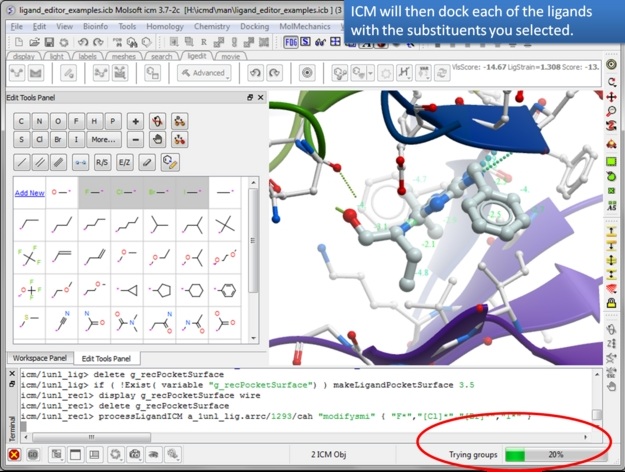 |
| Step 12: The editor will add each substituent and evaluate the score. This may take some time depending on the number of groups you chose but you can monitor the progress in the bottom right hand corner. |
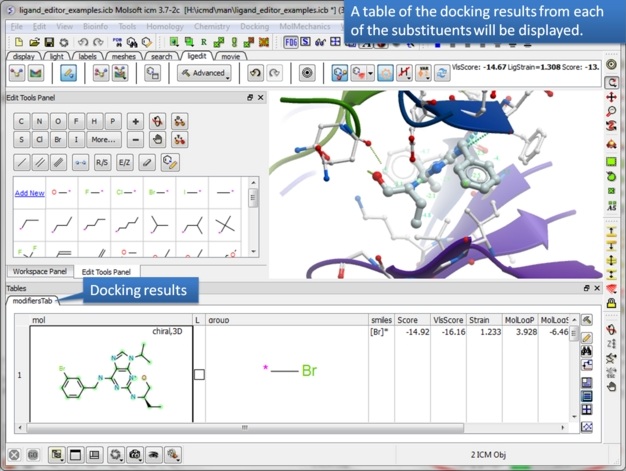 |
| Step 13: A table of ranked hits will be displayed. In this case the bromine substituent scored best. |
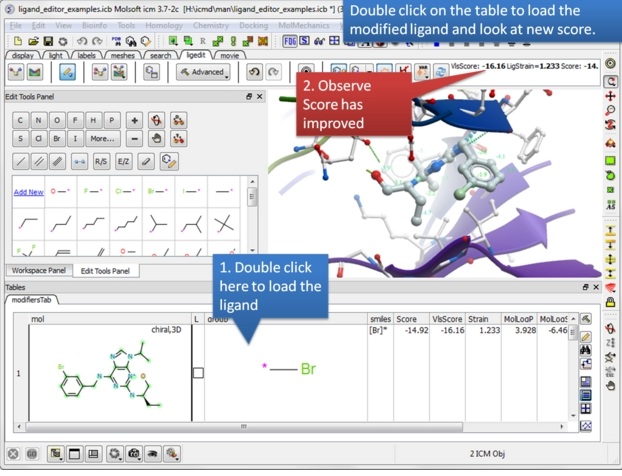 |
| Step 14: Double click on the table row to display the complex and observe the improved score. |
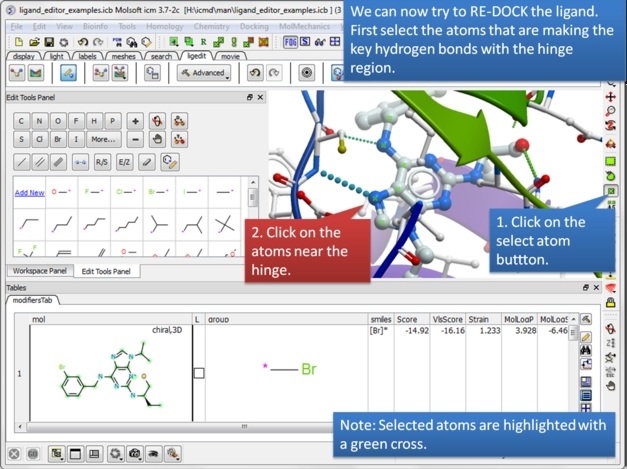 |
| Step 15: We can now re-dock this ligand to make sure the interactions are optimal. We must remember to tether the atoms making a hydrogen bond with the hinge and so first we must select these atoms. |
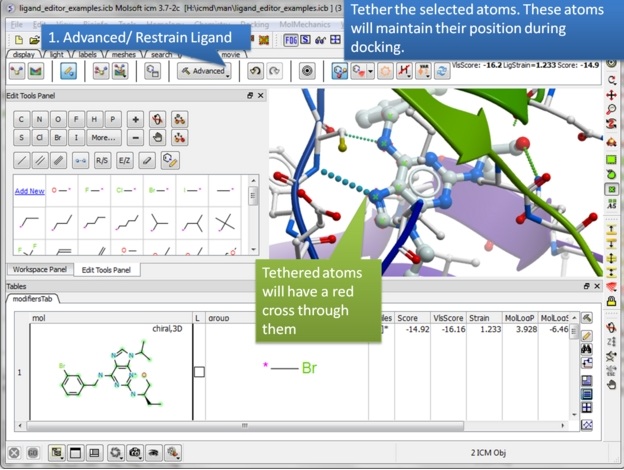 |
| Step 16: Tether the atoms. |
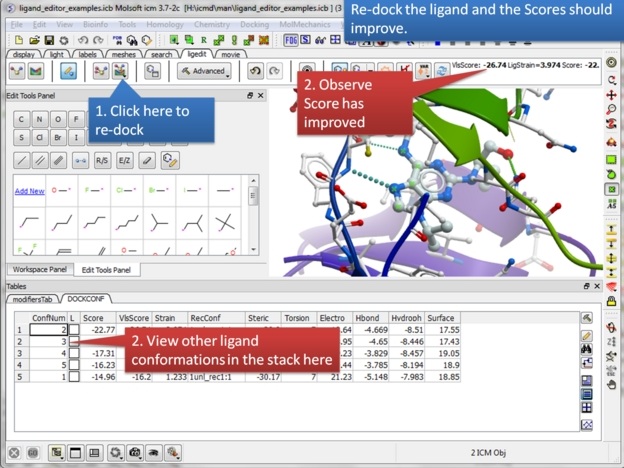 |
| Step 17: Click on the re-dock button and a stack of the best conformations will be displayed in a table called DOCKCONF. Observe the score has improved significantly for this modified ligand. |
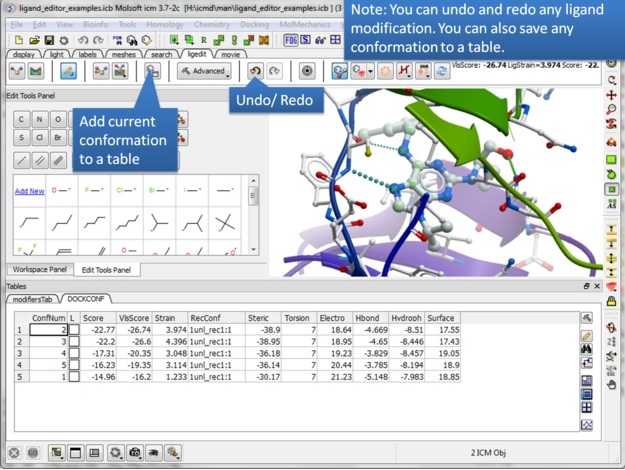 |
| Step 18: Never worry about modifying a ligand because everything is saved. Try anything you want because you can always undo and redo. There is also a convenient way of storing a modification you like in a a table. |
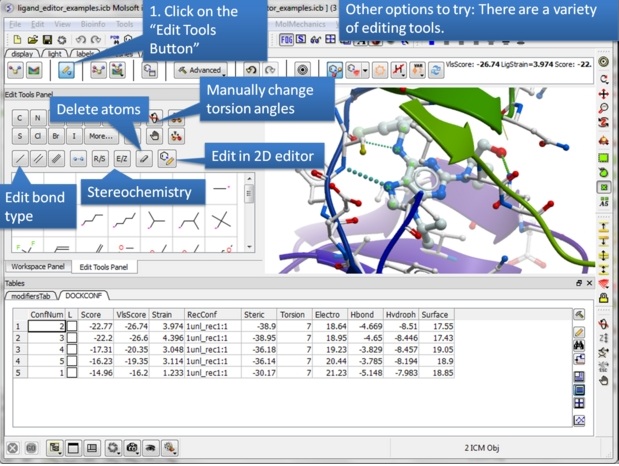 |
| Step 19: Explore the "Edit Tools Panel". |
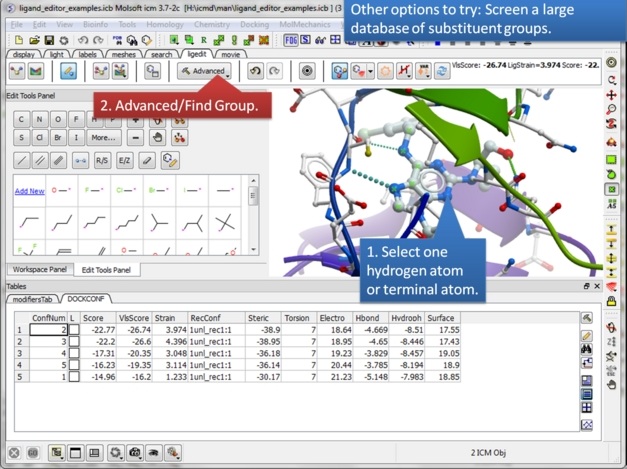 |
| Step 20: Perform a virtual screen of a substituent database. |
 |
| Step 21: You can also minimize side-chains inside the ligand editor. This may remove unwanted clashes between your receptor and ligand. |