[ Edit ligand 2D | Multiple Substituents | User-Defined Modifiers | Change Torsions | Undo and Redo | Modification History | Save to Spreadsheet | After Editing the Ligand ]
| Available in the following product(s): ICM-Pro | ICM-VLS | ICM-Chemist-Pro |
Video |
To edit a ligand:
- Setup the ligand and receptor.
- Display hydrogens using the hydrogen display button.
- Click on the Edit Tools Button and a panel of buttons will be displayed as shown below.
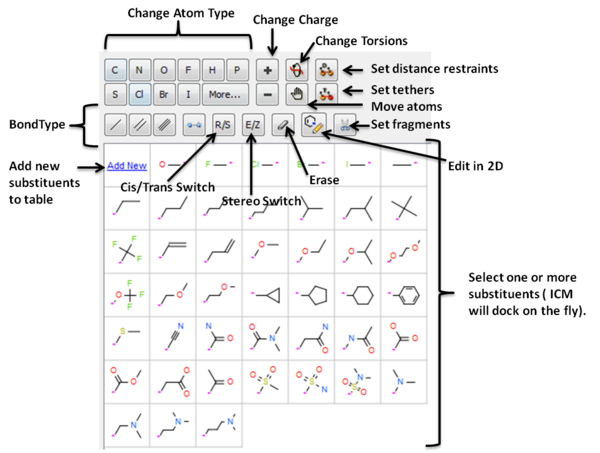
- To edit an atom or bond, first click on the desired atom, group or bond in the panel and the click on the atom or bond which you want to modify in the graphical display.
- Once you have made a modification you can evaluate the score and judge how good the modification was.
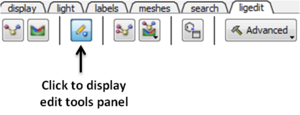
- See graphic below to understand what each button does.
| NOTE: After each modification a small mimimization is applied. To turn this off go to Advanced/Ligand Editor Preferences and remove the check mark from the option "Minimize After Modify Group". |
To edit the ligand in 2D:
- Setup the ligand and receptor.
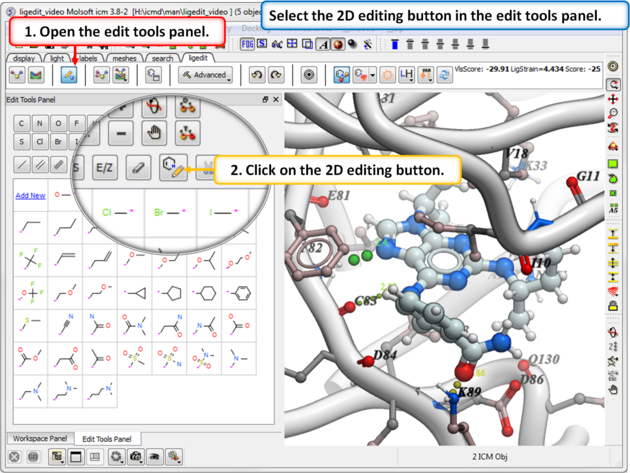
- Click on the Edit Tools Button and a panel of buttons will be displayed as shown below.
- Click on the 2D editor button and edit using the tools in the molecule editor.
- The 2D ligand editor can be displayed in the panel on the left hand side docked into the GUI or you can change the location by dragging it. The default location can be controlled by clicking on the Advanced button and choosing Preferences/ligedit2D Position.
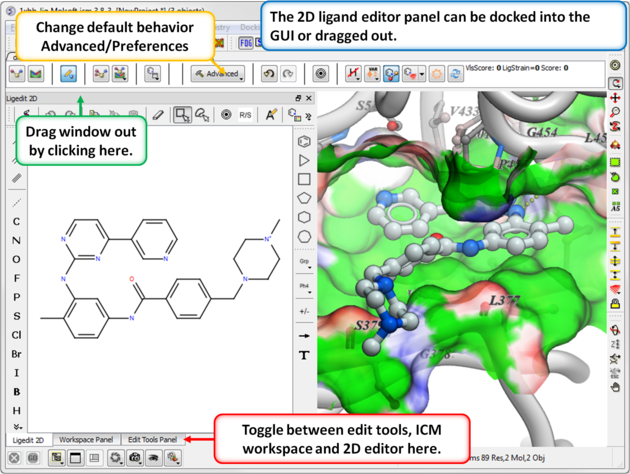
- Make changes to the ligand in the 2D editor and commit them to 3D as shown below.

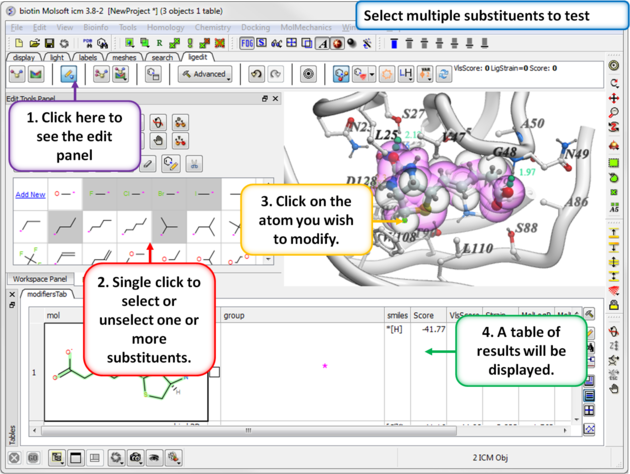
You can select more than one group. ICM will sample the energy of each group and return a table of the results ranked by binding score. The table columns are described below.
- Click on one or more substituents (shaded grey when selected).
- Click on the atom you wish to modify.
- The results will be reported in the modifier table.
About the modifiers table
mol = 2D sketch of ligand with core substructure highlighted in green. Modifier group is not highlighted in green.
L = Click in box to display ligand with modifier group.
smiles = smiles string of modifier group
SubstScore = Score for modifier group only
Score = Score of whole ligand including modifier group
MolLogP = Predicted LogP
MolLogS = Predicted LogPredicted LogS
MoldHf = Preidction model build for 'delta Hf in gas' property, using public NIST database. Description can be found: http://webbook.nist.gov A low dHf value means that the compound is more 'stable'.
MolPSA = Polar Surface Area
Volume = Volume of ligand.
The default set of modifiers LIGAND.modifiers is just an sarray of smiles and it is hard-coded into ICM. You can add your own groups by clicking on the "Add New" button in the editor http://www.molsoft.com/gui/edit-ligand.html When sketching you need to add an attachment point - right click on the attachment point atom in the 2D editor and select attachment point.
You can also add manually through the command line:
LIGAND.userModifiers = LIGAND.userModifiers // "c1[c*]nc(N)s1"
write system preference
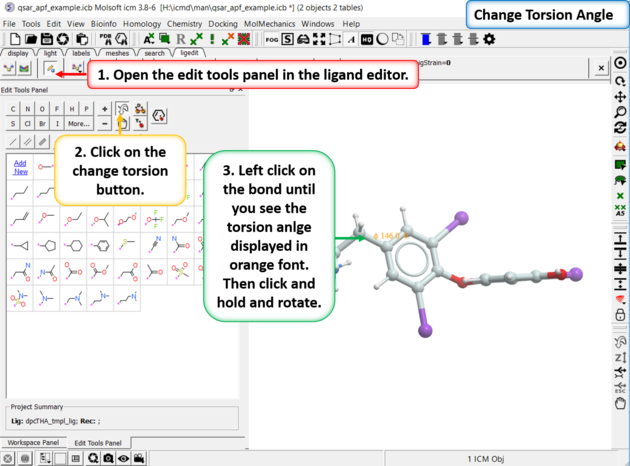
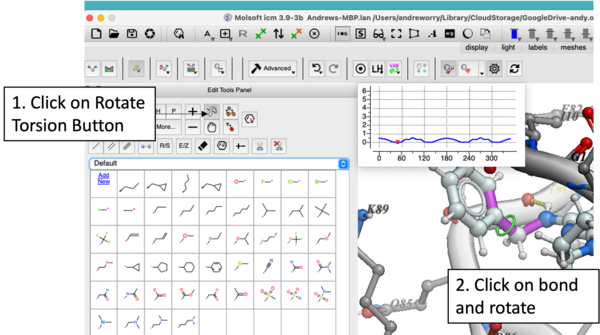
To manually change torsion angles - click on the torsion angle button in the Edit Tools Panel. Click on the bond you want to rotate until you see the torsion angle displayed in orange font. Then click and hold and rotate the torsion.
In version 3.9-3b you will see a plot as you rotate the torsions. Current value of -Log(probability) will be shown as a red dot on a profile in the left top corner.
Every edit (even after docking) can be undone or redone.
To undo or redo:
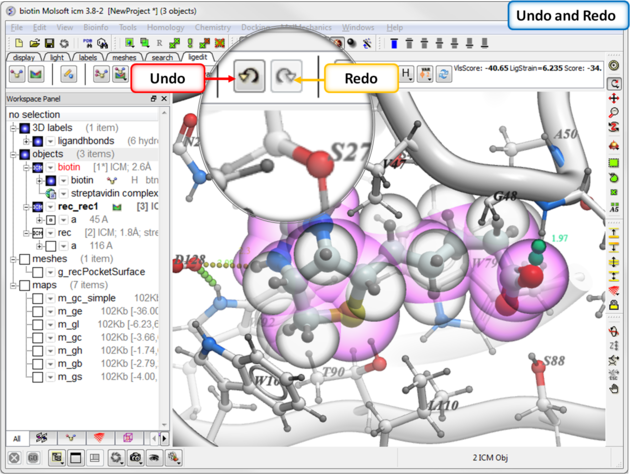
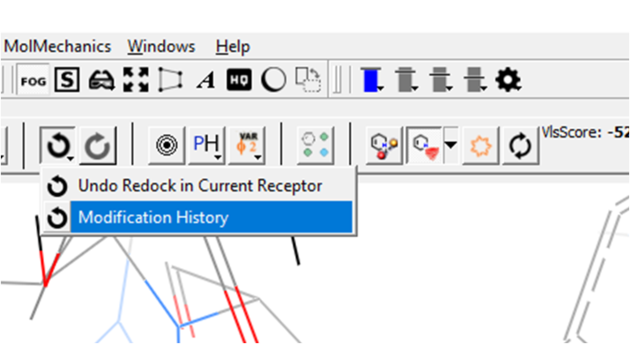
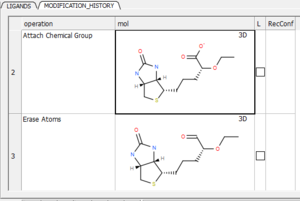
You can view a table with a log of all modifications by clicking and holding on the "undo" button and choose "Modification history". This will produce a chemical table with a column (operation) describing the modification. Double click to load the modification into the receptor or use the "L" column to toggle the display on and off.
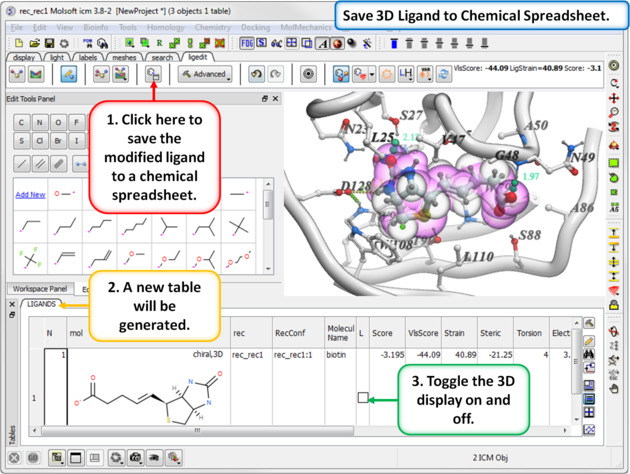
If you like a particular ligand and want to save the changes for use later, then you can save the 3D ligand to a chemical spreadsheet. You can then double click on the ligand in the spreadsheet to load it back into the editor or toggle the ligand on or off.
To save to a chemical spreadsheet:
- Edit the ligand.
- Click on the save to chemical spreadsheet button and a table called LIGANDS will be generated.
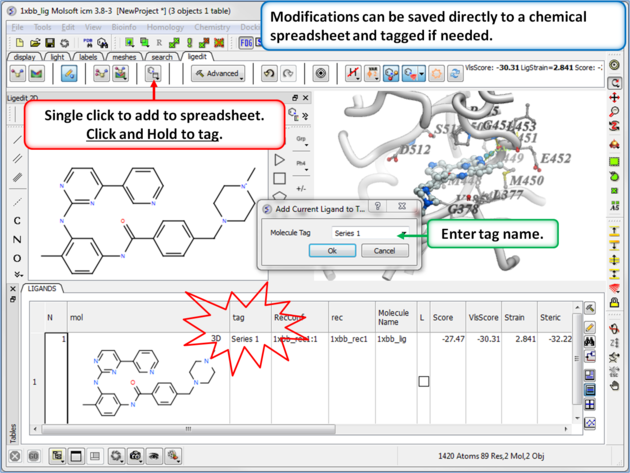
You can also tag a chemical with a unique name which is stored in the spreadsheet. To do this click and hold on the "Add Current Ligand to Table" button and enter a tag name. The ligand table can be grouped by this tag column (Right Click on the column and choose "Group View By").
After editing the ligand you can:
- Re-dock or minimize the ligand and evaluate the energy and score or view interactions such as hydrogen bonds and energy circles.
- Before docking if certain groups or distances need to be retained you can set distance restraints or tether atoms.
- You can try additional changes by screening a database of substituents.
- Add the ligand to a chemical spreadsheet.
- Save the docked ligand and receptor complex as a PDB file .