[ Surfaces | MolSkin | Color by Proximity | Color by Selection | Meshes | Macroshape | Google 3D | Display or Undisplay | Display Options | Mesh Clipping | Save Surface | Occlusion ]
| Available in the following product(s): ICM-Browser-Pro | ICM-Pro |
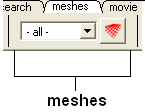
Click on the tab button entitled 'meshes' and more graphics tools for surfaces are available. In ICM surfaces are sometimes referred to as meshes or graphical objects (Grobs).

 |  |
| Surface | Plain Solid |
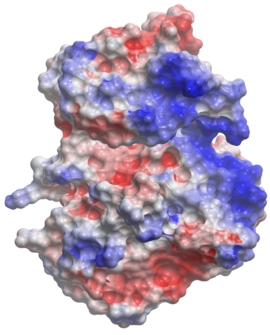 | 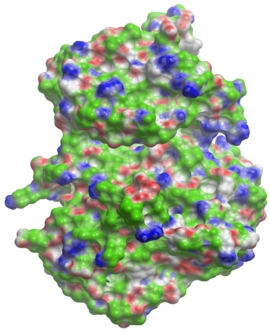 |
| Electrostatic Surface | Binding Property Surface |
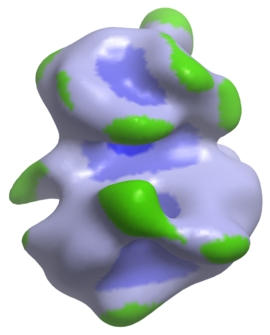 | 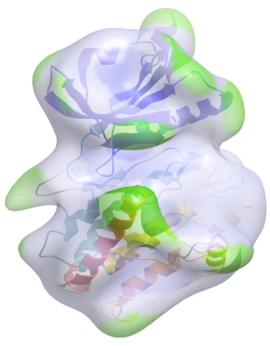 |
| Macroshape Solid | Macroshape Transparent |
The surface of your structure can be displayed and colored by electrostatics or binding properties. To do this:
- Load a structure into ICM File/Open or tab-pdb{PDB Search}
- Convert the structure into an ICM object.
- Select the 'meshes' tab button.
- Click on the drop down arrow menu shown below and select which surface you wish to generate.
- Click on the generate surface button next to the drop down arrow.
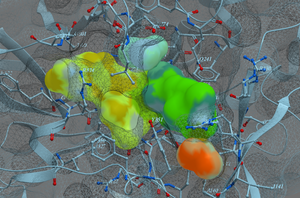
MolSkin is a new macro that instantly makes publication quality graphics and it gives each molecule a color and colors contact patches. It undertakes the following:
- Molecular surfaces are generated with those assigned colors and occlusion shaded.
- Carbons of each molecule are colored by its own consistent color.
- Labels, ribbons, are colored accordingly.
- Surfaces are gradually cross-colored by each other to mark the contact patches.
- The labels are brought to the surfaces.
To use MolSkin:
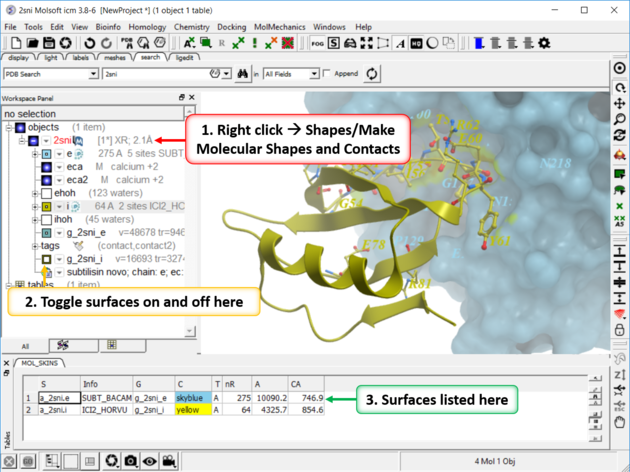
- Right click on the object in the ICM workspace and choose Shapes/Make/Molecular Shapes and Contacts.
- Once the surfaces are made they will be listed in the ICM workspace where they can be toggled on or off.
To color a surface by proximity to neighboring molecules:
- Make a surface.
- Right click on the molecule you want to color by proximity and choose Shapes/Make/Color by Proximity.
- Make a surface.
- Make a selection.
- Right click on the molecule you want to color by selection and choose Shapes/Make/Color by Selection.
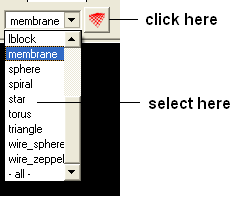
A variety of shapes can be constructed automatically using ICM. These shapes are referred to as meshes. The types of shapes you can build are shown in the drop down option in the meshesh tab
To make a shape select it from the menu by clicking on the down arrow and then click the button next to the menu. The shape will then be displayed in the 3D graphics window.
A macroshape can be constructed and allows easy viewing and manipulation of the structural representation. A macroshape representation is ideal for large structures which allows the user to easily identify important regions of the structure and facilitate the return to the 'standard' view of a particular molecule. All the buttons needed to display a macroshape structure are shown below in the 'meshes' tab.
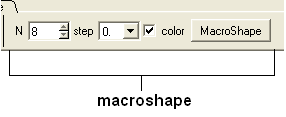
To construct a macroshape:
- Load a molecule into ICM File/Open or tab-pdb{PDB Search}
- Select the amount of detail required in the shape by increasing the values in 'N' or 'step' data entry box (note the default values are usually sufficient).
- Check the 'color' if you wish your molecule to be colored.
- Click the button labeled 'MacroShape'.
Macroshape can also be used from the View menu: View/Macro Shape
To read in a 3D Mesh from Google in KMZ or COLLADA format:
- File/Load/ 3D Mesh in KMZ or COLLADA Format from Google
- Search for the object you would like to view and download it.
- To read the file go to File/Open
To display or undisplay the surface click in the box in the ICM workspace as shown below:
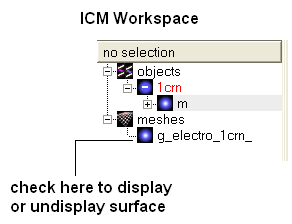
| NOTE: All surfaces, meshes and macroshapes come under the one heading of meshes in the workspace panel. |
[ Resize | Move | Mesh Representation | Color and Lighting ]
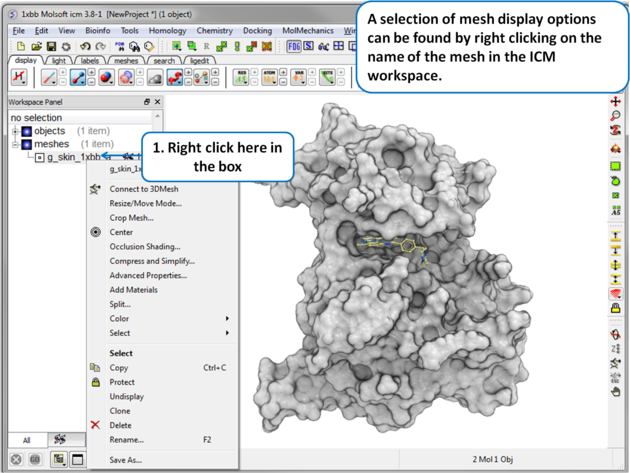
A number of options relating to meshes can be found by right clicking on the mesh in the ICM Workspace. This section describes some of these options.
Once a mesh has been created you can move it and resize it. To do this:
- Locate the mesh in the ICM Workspace and right click on it
- Select the Resize/Move Mode in the menu.
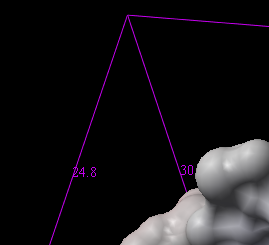
- A purple box as shown below will surround the molecule.
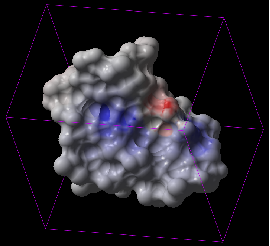
To resize the mesh click on one of the corners of the box and drag to the required size. The number displayed on the edges of the box represent the dimensions.
To move a mesh:
- Locate the mesh in the ICM Workspace and right click on it
- Select the Resize/Move Mode in the menu.
- Click on the mesh in the graphical display with the middle mouse button.
There are five different display modes:
- Dot
- Wire
- Solid Rugged
- Solid Smooth
- Smooth Transparent.
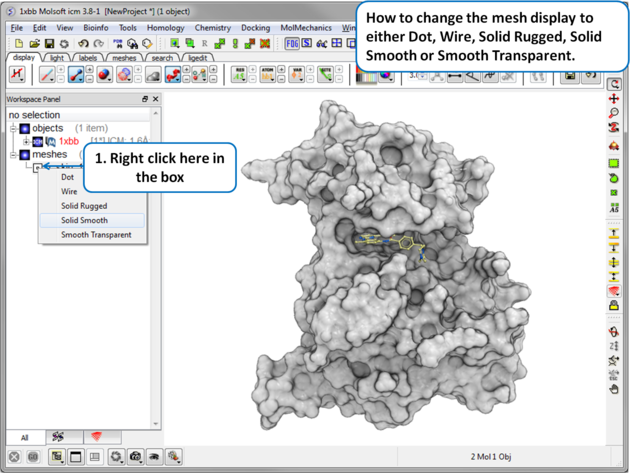
There are a number of options to color and change the display of the mesh. These options can be accessed simply by right clicking on the mesh name in the ICM Workspace as shown below.
Clipping tools can be used to adjust the frames of the mesh independently of other objects.
The buttons shown below can be used for this purpose.

The buttons used for clipping are described in the section entitled Clipping Tools.
To clip the skin independently of the object as shown in the image above:
- Display object and mesh.
- Click and hold on clip meshes button(red button) and select Reset Clipping to Default and check the option Clipping enabled
- Click on the front clipping plane button.
- (Optional) To lock the mesh clipping click on the yellow lock mesh clipping button.
You can save a mesh as a wavefront object by right clicking on the mesh in the ICM Workspace and selecting SaveAs.You can save in the following formats:
- Wavefront (.obj): A widely used text-based format that stores 3D geometry including vertices, normals, and texture coordinates. The Wavefront .obj format itself does not directly store color information per vertex or face, but it can reference color information indirectly through a companion .mtl (Material Template Library) file.
- .off (Object File Format): A simple format for polygon meshes that lists vertices and faces without support for textures or normals.
- .stl (STereoLithography): A popular format for 3D printing that represents only the surface geometry using a collection of triangular facets.
The occulusion shading option provides better representation of depth within a cavity. The color of each surface element of a grob (mesh) is changed by mixing its own color with the background depending on the burial of the surface element.
To add occlusion shading:
- Right click on the mesh in the ICM Workspace and select Occlusion Shading. The occlusion shading value can also be changed before generating the mesh in the meshes tab.
- Enter a depth value - default is 0.8. Higher values will generate a more dramatic shading.
See example here.