[ Slide Movie | Screenshot Movie ]
| Available in the following product(s): ICM-Browser-Pro | ICM-Pro |
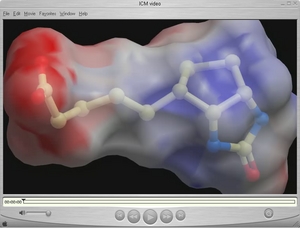 A movie is an excellent way of communicating 3D structural data.
The resulting movie can easily be transfered into other applications such as Microsoft Powerpoint.
A movie is an excellent way of communicating 3D structural data.
The resulting movie can easily be transfered into other applications such as Microsoft Powerpoint.
There are two ways to make a movie:
- Make a movie directly from a series of slides.
- Make a movie directly from screenshots.
An alternative to a movie is a fully interactive 3D document embedded in Windows PowerPoint or a Web Browser, this can be undertaken using slides and the ActiveICM plugin.
To make a movie from a set of slides:
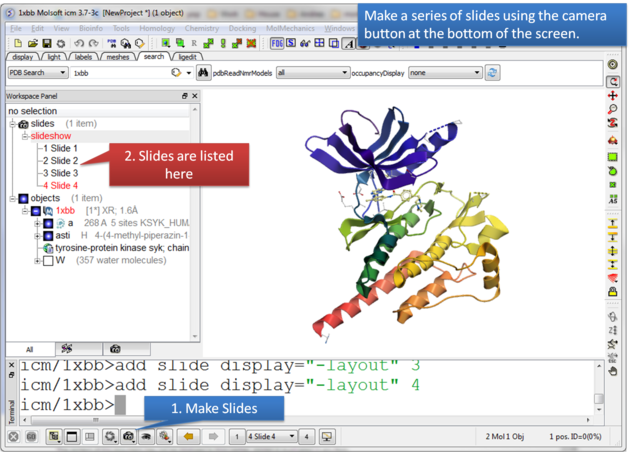 |
| Make a series of slides using the camera button. |
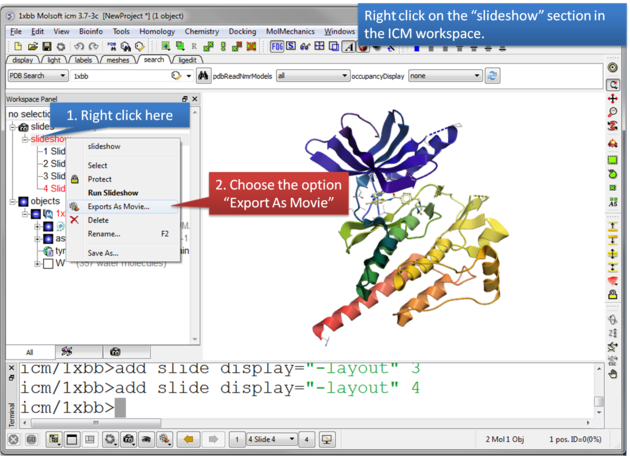 |
| Right click on the slideshow in the ICM Workspace and choose the option "Export as Movie". |
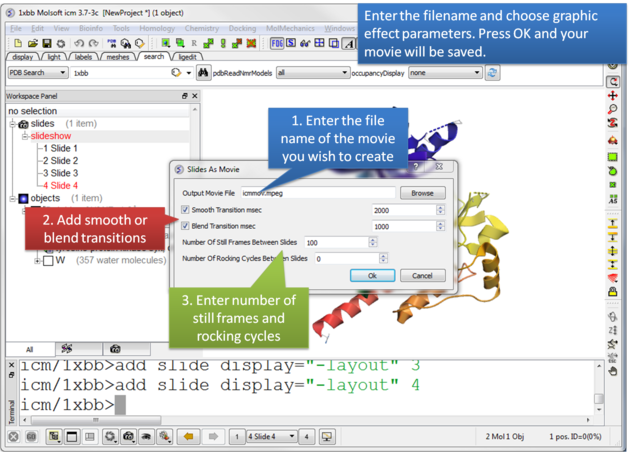 |
| Enter the filename for your movie and set the movie effect parameters. Press OK and the movie will be written to a file. |

To make a Screen-grabbing Movie follow these steps:
- Resize the graphical display to the screen size/resolution you need. You may also want to select the high quality image button and antialiasing to improve the quality of the movie or add visual effects such as shadows.
- To begin making a movie click on the movie making button at the bottom of the graphical user interface (as shown below).
- Enter a file name for your movie and select the movie format (.mov, .avi, mpeg).
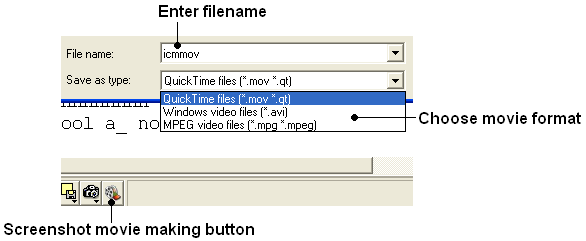
| NOTE: If you want to make a movie to include in a PowerPoint presentation you need to save the movie in AVI format. |
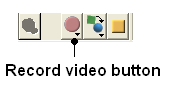
- To begin recording the screenshot movie click on the red Record video button. Anything displayed in the graphical display will be recorded, for example you can record animations and transitions. Specifying the number of cycles in the animation (rocking, rotation) is an ideal tool for screen-shot movie making. If you have a fast computer you can use Realtime screen grabbing which can be selected by clicking and holding the Record video button. The real time option can also be set in File/Preferences/Gui menu.
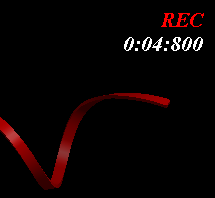
- The length of the movie in minutes, seconds and milliseconds is displayed in the top right hand corner of the graphical display.
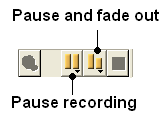
- You can pause the movie and fade out by clicking on the button shown below. The number of frames for the fading out option can be controlled using the option in File/Preferences/Gui
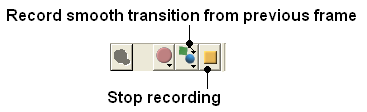
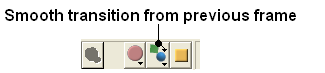
- You can record a smooth transition from a previous frame by clicking on the button shown below.
| NOTE: Anything you do in the graphical display will be recorded in the movie. For example you can change representations, lighting, add new molecules etc. This can be achieved in a more controlled manner using the pause and record smooth transition button. |
- Once you have paused the recording the viewpoint and representation of the molecules can be changed and a smooth transition from the previous frame can be generated by selecting the Record smooth transition from previous frame button.
- To stop recording a video press the button shown below.